Friday, June 29, 2012

L's First Backpack for EnteraLite Infinity feeding pump

feeding pump backpack, EnteraLite Infinity pump, preschool backpack, feeding tube, special feeding backpack,EnteraLite Infinity Super-Mini Backpack for EnteraLite Feeding Pumps, EnteraLite Infinity Feeding Bag with Attached Pump Set, Zevex Super Mini Backpack For Entralite Inf Pump, Black , Zevex TI-Supermini Backpack, Zevex Super Mini Backpack


L got his feeding tube when he was almost 17 months old and changed to a GJ tube when he was almost 2. Because the GJ tube feeds the intestines (bypasses the stomach) you have to do continuous feeds. We needed a backpack that he could wear for 10 hours during the day. The backpack that came with his feeding tube was huge for him. It was almost as tall as he was so we searched for a backpack that would fit him. We found a super-mini backpack on Amazon that was made for the EnteraLite Infinity pump that L was using. The problem was that it was 80 dollars. We live on one income so that was a lot for one little backpack but L needed it so we scraped some money together and bought this one. We thought the blue and grey was cute and better than just the plain black. At that time there was also a red Hawaiian backpack that hubby thought was too girly. We got the backpack and it fit him perfectly. It took him some time to get his balance adjusted but after a couple days his backpack was a part of him. His little backpack didn't even slow him down. He put it on about 8 am and wore it until around 4 pm when he got to run around without it on for a couple hours before bed. At bedtime we would hang the backpack on the knob of the dresser right next to his crib and his pump would run all night.
L wearing his super mini backpack

L's first day of school wearing his super mini backpack

Fast forward 6 months....His backpack started coming apart at the zipper seam and pulling apart. We were a little disappointed that it had only been 6 months and we were already having to buy another backpack but considering he wore it every day all day long we were okay with getting him another one. We bought a solid black one this time from the same company on Amazon even though the solid black was $100 now. Not even 2 week into wearing the new backpack it started falling apart. We were mad! How could something so expensive that is made by a medical company that knew that kids were wearing this backpack just fall apart after 2 weeks? Well we returned it to that company and after some angry emails we got our money back. Luckily we had a friend whose child had a feeding tube but didn't need the super-mini backpack anymore so she gave it to us. It was amazing at the quality difference between that older one and the one we just returned. It was heavier duty with thicker fabric and the seams were strongly reinforced. It was like the company making the backpacks decreased the quality of the backpack over time while increasing the price. Ridiculous! We also found someone giving away their backpack on Facebook so we had 2 good backpacks and those lasted us until last month. When we looked to see how much the backpacks were currently running we found prices between 75-130 dollars. We decided to try a couple different backpacks and I will tell you about those another day! Here are some pictures of the old backpacks and the good and bad of the super-mini backpack:

The back pack has a front zipper so you can access the pump easily and elastic to hold in place.


You can see that the bag (500ml bag) sits a little above and behind the pump. The location of the pump and bag disperses the weight evenly.


Behind the feeding bag is a little mesh pocket that we use to have our emergency items in case we need them. We keep a 5ml syringe, roll of tape, NG tube, armband (from a hospital admission) with his information on it, extra GT button, drain sponge, and extension tube. Sounds like a lot but it is pretty compact.


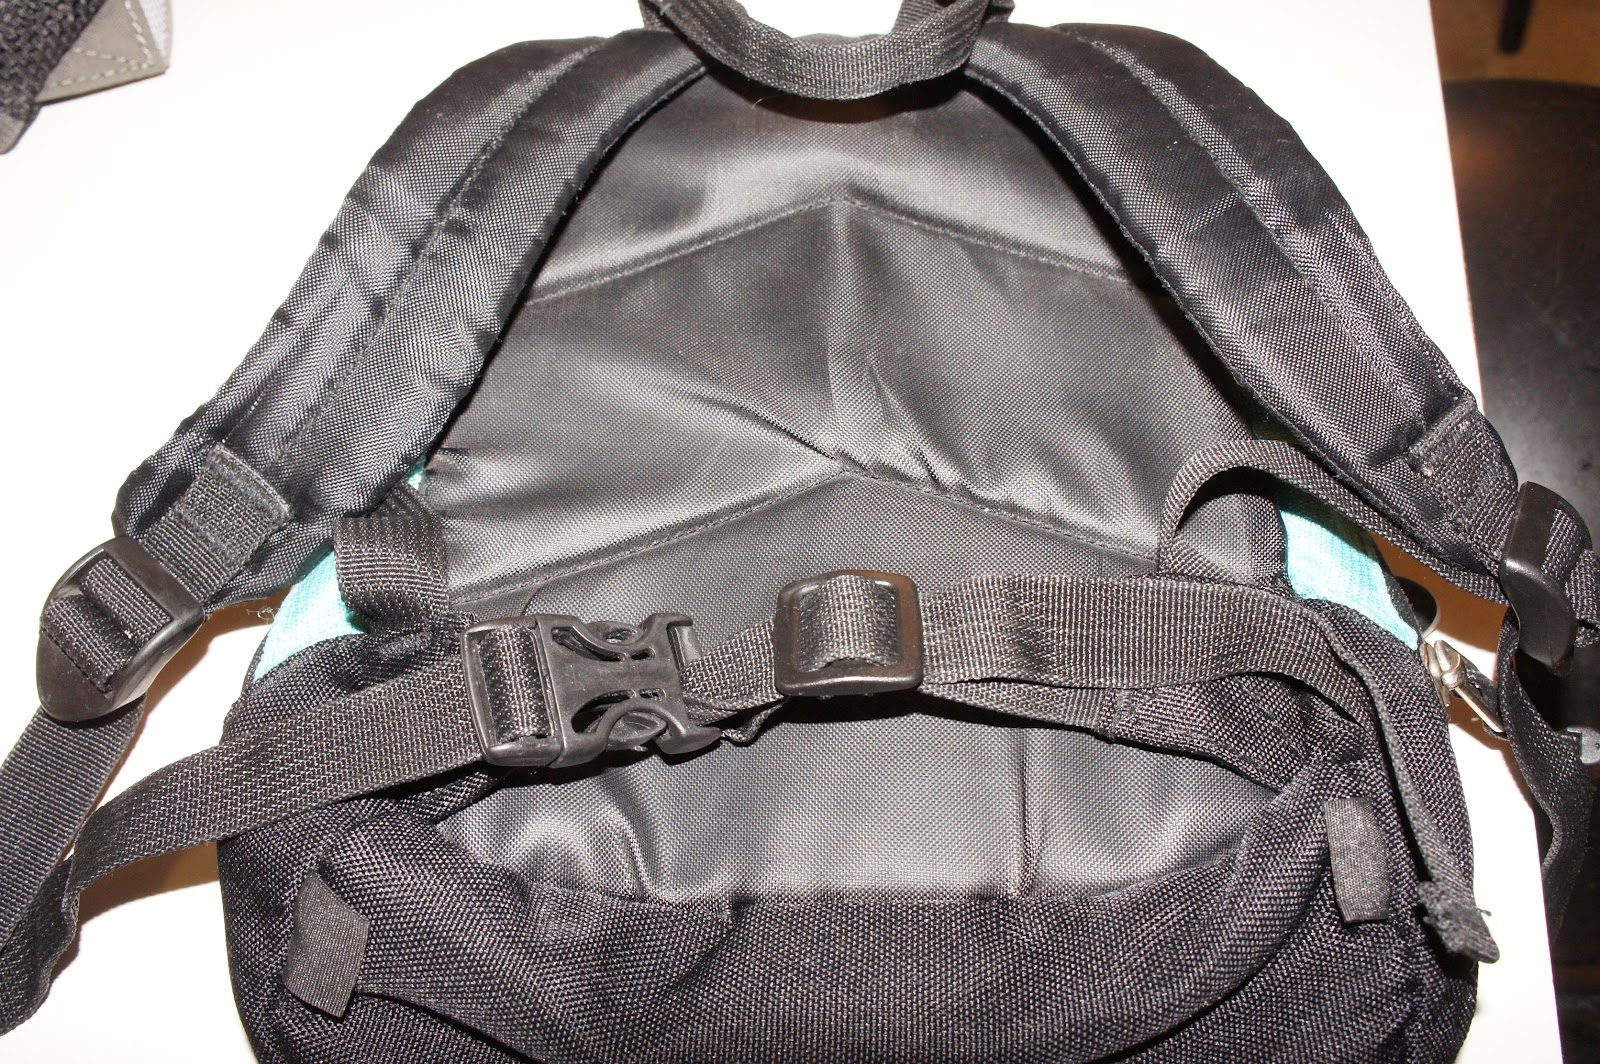
The backpack has a "chest" strap that is really helpful for when your stubborn 2 year old gets mad and thinks the way to defy you is to take off his backpack! Even if he gets his arms out of the shoulder straps the chest strap keeps it from falling and possibly pulling out his tube. The problem with this strap is that it is very low and sit right on his GJ tube which can sometime cause irritation. One of the backpacks we got from Facebook had the straps cut off so we had to tie the extra length on the shoulder straps together. He can't get the bag off when we do that so now he will drop his pants. Another story for another time!

The Good:  Velcro strap that fits around the bag and there is a hook for extra support to keep the bag lifted up and prevents lines from getting kinked.

The Bad:  The velcro wears out very fast and most of the time comes undone but the hook keeps it from falling down. The newer bags are a little harder to hook as the holes to hang the bag with are more compact than they used to be and there isn't a really easy spot to clip the hook anymore.
 
The next two pictures are of the bag that the zipper has fallen apart on. You can see that the thread that holds the zipper to the backpack seam has come undone and the zipper actually separates from the bag. Once the zipper starts separating from the seam it makes it really hard to zip up and usually starts damaging the zipper. At that point there isn't much you can do with the bag. J likes to play with them and put his matchbox cars in them. Both worn out bags are in the toy box! The bag that we returned had issues with the seams. They were poorly sewn and came apart but the zipper was still intact. The only good thing about that was that we were able to use safety pins on the seams until we quickly found a replacement bag.


*Something to remember--always have a back up bag! You never know when you will need it. It always seemed we were on a trip when the bags fell apart.

*Also remember that you can click any of the pictures to see it larger and in more detail!

Wednesday, June 27, 2012

BLT Pasta Salad recipe


BLT pasta salad, noodles, avacado, tomato, bacon, mayo, vinegar, sugar, mustard, cider vinegar, apple cider vinegar, sour cream, salt, pepper, shredded lettuce, spiral noodles, elbow noodles


Time for a healthy recipe! I got this a long time ago and I don't even remember where I got it. It is another good summer recipe that is best with fresh tomatoes, crispy bacon, and perfectly ripe avocados. You can make it with your favorite pasta. I like it with the spiral noodles but have made it elbow noodles too. This is the original recipe and while I haven't made it in a long time I know that I tweaked it a little bit to fit my liking. So taste the dressing before you mix it with your salad and make it your own. This definitely is best fresh and doesn't get better with time. Usually after 2-3 days the lettuce and avocados are turning brown, the noodles get soggy, and the dressing becomes pretty bitter. So make it, share it, and eat it all day!

BLT Pasta Salad
1 small box spiral noodles or the noodles of your liking
4 cups cut-up tomatoes
4 strips bacon, cooked and crumbled
3 cups thin sliced lettuce (the easy way is to buy the shredded lettuce in the salad section)
1/2-1 sliced avocado (I love lots of avocado in my salad)
1 teaspoon sugar
2 teaspoons cider vinegar
1/2 cup fat free Mayo
1/3 cup light sour cream
1 tablespoon Dijon mustard
Salt and pepper to taste

Cook your noodles and then rinse them in cold water. Next you mix the noodles with bacon, lettuce, and tomatoes in a big bowl with room to toss/stir the salad. In another bowl mix the sugar, vinegar, mayo, sour cream, and mustard. This is where you need to make sure that it pleases your taste buds. I usually leave out the mustard and add a little more vinegar and sugar. I like my dressing strong! Poor hubby hates the smell of vinegar and always complains but too bad because this is good! Pour the dressing over the noodle salad, stir really well and put into fridge. I can't wait for it to get fridge cold and will eat a big bowl first. Then later in the day I will eat some more. And then eat some for breakfast, lunch, and dinner the next day. Yes I have a problem...I can eat something every day for a week and then be done with it for several months!

Monday, June 25, 2012

Best Ever Chocolate Cake

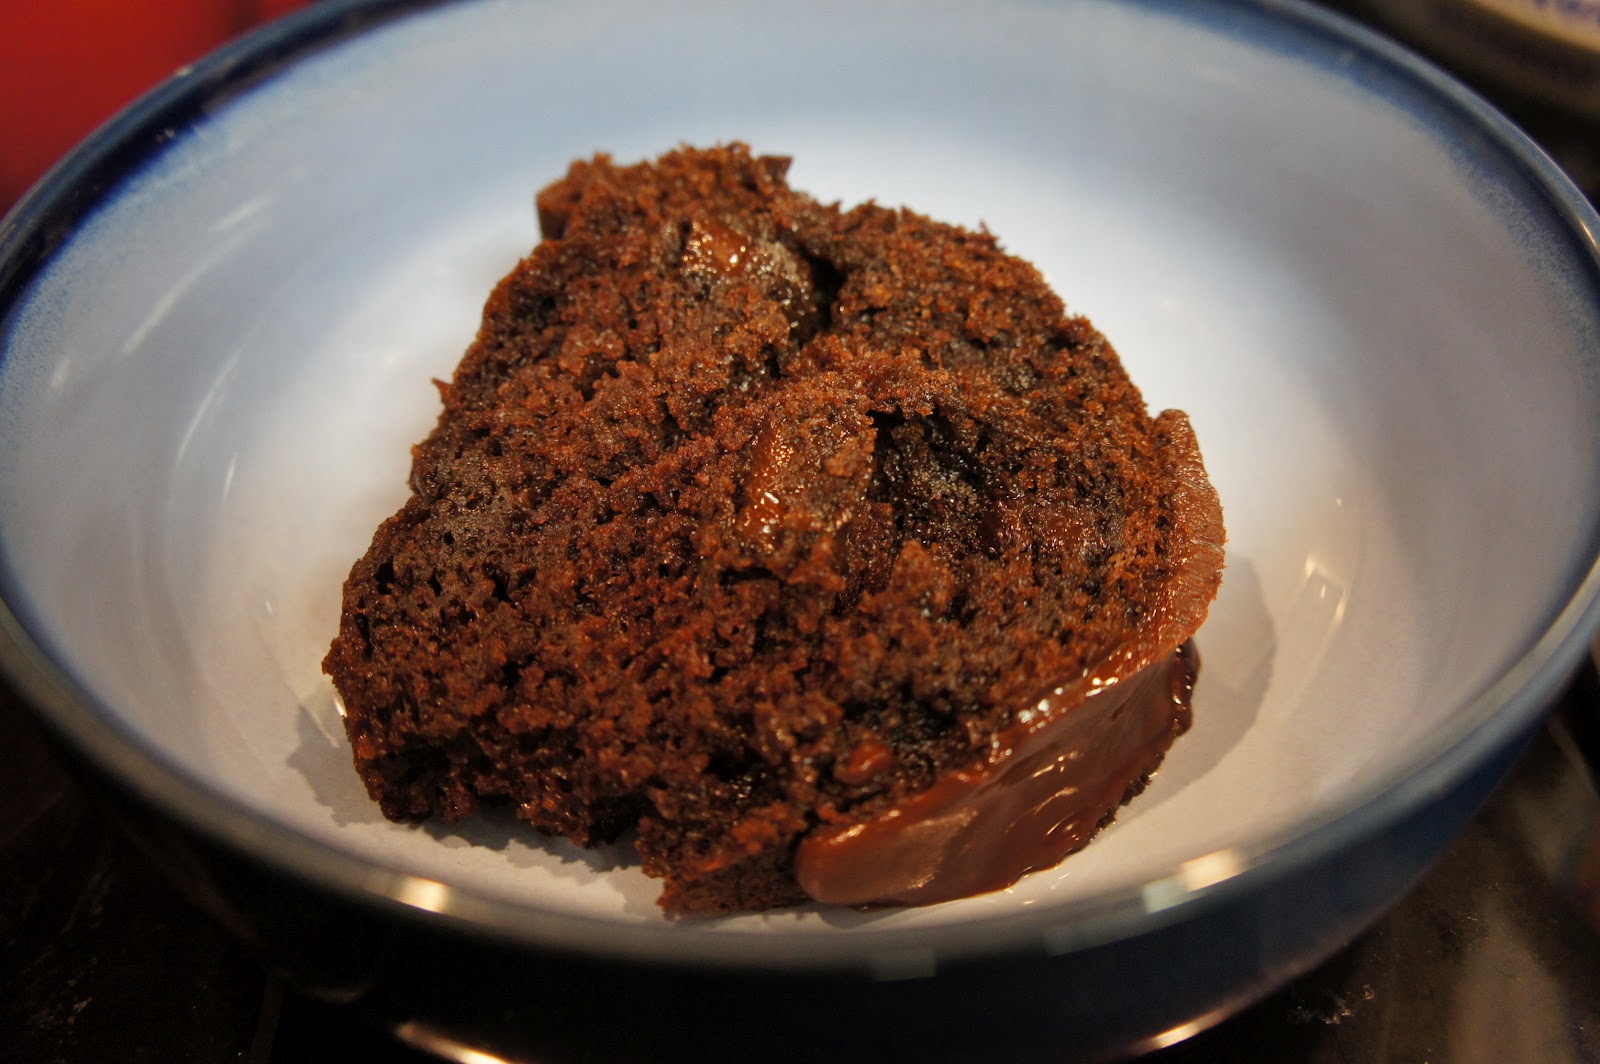
We had college friends over this weekend that we haven't seen in over 4 years and we had a lot of fun. I wanted to make something yummy that we could stay up late and eat over while remembering all the fun we had in college. This cake is my favorite and pretty easy to eat cook. It is very moist and very rich. A little piece goes a long way to soothe my chocolate cravings. It is the closest thing to Chili's Molten Chocolate Cake that I have made that isn't a lava cake. Trust me...it is good and I don't think I have one person not like it! It has been years since I have made this and I was so excited that I forgot to take pictures until I was all ready to put it into the oven!


I also forgot to take a picture of it as a finished product before we dug into it! This is what was left after 2 days of eating.


It has been in the fridge for 2 days so the chocolate icing is a little discolored


Best chocolate cake EVER
 
Cake:
1(18 1/4 ounce) package devil's food cake mix
1 (3.9 ounce) package instant chocolate pudding mix
1 cup sour cream
1 cup milk
1/2 cup vegetable oil
1/2 cup water
4 eggs
2 cups chocolate chips

Icing:
6 tablespoons butter
1 cup chocolate chips

Preheat oven to 350 degrees. Grease and flour a 10-inch bunt pan (I use Pam baking Spray) In a large bowl combine cake mix, pudding mix, sour cream, milk, oil, water, and eggs. Beat until blended. Mix in the 2 cups chocolate chips. Pour batter into prepared pan. Bake for 40 to 50 minutes or until a toothpick inserted into the center of the cake comes out clean. Cool 15 minutes in the pan then turn out onto a wire rack (or serving plate). Cool completely.

To make the glaze: Melt butter in a saucepan over medium heat. Add 1 cup chocolate chips and stir continuously until smooth. Be careful to keep stirring and not to have the heat on too high. We wouldn't want to burn the delicious chocolate! Drizzle over the cake.

I always keep the cake in the fridge just because of all the eggs and dairy products that go into the cake. To make it taste more like the molten chocolate cake this is what I do: Heat in microwave for 25-30 seconds and add your vanilla ice cream on top! I love when the ice cream melts down in the cake and the chocolate icing is slightly melted. Yum.....I think I hear some cake calling me from the fridge.


Friday, June 22, 2012

Easiest And Cheapest Way To Buy Diapers

Besides our premiums for healthcare, our biggest baby expense was the cost of diapers. Having twins also means twice the diapers, so I took my time researching the easiest and cheapest way for us to get diapers. I won't repeat the description of our situation from the last post (read it here), but we did not have the time (and sometimes did not have the ability) to make a special or late-night trip for diapers.

I had heard of Diapers.com from a friend and tried them first. Prices were good - the same or a little cheaper than buying from our local Wal-Mart, Kroger or Walgreens. They have free 2-day shipping on orders of $49 or more. Buying for two babies meant going through two of the largest-sized boxes of diapers each month, so our order always shipped free. Diapers.com regularly had online manufacturers coupons of $1 or $2 off (like the coupons you would get in the newspaper or mail) and you could also mail in your own coupons to use for purchases on the site. This worked very well and saved a lot of time and hassle - when I noticed the diapers were starting to run low, I jumped online, took less than 2 minutes to order, and two days later they would show up at the front door. No complaints at all expect that after 10-12 months, Pampers raised their prices on everything, so I started looking around and quickly found a better and even easier deal.

We are huge fans of Amazon.com and have been using them for diapers ever since. Amazon Mom is a free program for parents and caretakers of small children. Amazon Mom members receive benefits such as three months of FREE Two-Day Shipping with Amazon Prime, 20% off diapers and wipes which are auto-delivered to your doorstep with Subscribe & Save and other promotions geared toward parents. The Subscribe & Save program offers automatic monthly delivery of many household items. You choose how often to deliver (from one to six months) and receive a nice discount in addition to the convenience. You can space shipments out to avoid overbuying or cancel immediately after the first shipment, so it's really a no-strings-attached membership.

J and L are potty training, so instead of getting two boxes of diapers each month, I've changed it to one box of diapers and one box of pull-ups. If we're running low, an extra shipment can be sent with the same discount. A week before scheduled shipments, Amazon emails a reminder and gives the option of skipping the shipment or cancelling the subscription. This has really saved us time and frustration while providing the lowest cost for diapers.


Wednesday, June 20, 2012

How We Chose Diapers For The Boys

I know there are very many options when it comes to diapers. Since J and L were premature twins with reflux and other needs (home oxygen, pulse-ox monitor, L had to spend most of his time being held or laying on a wedge to stay elevated) we did not even consider cloth diapers. I've heard they save money and some have used delivery services that make it convenient. If cloth diapers have worked for you, please leave a comment and let me know. For us, our first year was consumed with round-the-clock feeding, changing, and medicating (J had a couple and L had 7 daily medications) while trying to get a little sleep, monthly appointments with multiple doctors and hospital clinics, therapies, surgeries, and much much more.

Before the boys were born, I heard one of our friends talk about ordering diapers online, and that is where we began. I'll write a detailed post about the sites we used, how we liked it, costs and convenience, and what we've found to be the best. For now, I'll just say that the boys began their lives using Pampers Swaddlers Sensitive in the hospital. J was there for 6 weeks and it was 4 months before L was able to come home - those diapers worked well for them, so we saw no reason to change.

Yes, brand-name diapers are more expensive and after a few months at home we tried other brands to try saving money. Every baby is different and you may have had great experiences with store-brand diapers, but they just did not work for us. The Target brand did not fit as well, were much thinner, and we had to change the boys at least twice as often (plus deal with many more blowouts than normal). The Wal-Mart brand fit better, but again were thinner, less absorbent, and L's skin had a bad reaction to them. We buy store-brand food and most other things almost exclusively, but when it came to diapers, Pampers were the softest, held the most, and required less changing. For us, the premium price was definitely worth it.

Pampers Swaddlers Sensitive diapers

Monday, June 18, 2012

Couscous Salad

Need a quick and easy lunch? Couscous is our favorite side dish that we usually eat with some variety of chicken. It is super easy to make: Boil water, put couscous in pan, stir, turn off heat, let sit for 5-8 minutes, and fluff with fork. That's it! You can find it in the rice section even though it is a pasta made from wheat. We buy a big container of RiceSelect Original Couscous and spice it up the way we (I) like it--usually boil it with a chicken bullion cube and once done add parmesan cheese, ranch powder, and garlic salt. Lots of parmesan....we go through it real fast. This is a light but filling meal that is great for summer time when you can get fresh ingredients to go in it. I need to go raid my parents garden soon for some fresh tomatoes! Here is how this recipe goes:

The amount of broth/water depends on how much couscous you want to make. It is a 1:1 ratio. Usually one cup of couscous is enough for hubby and me with a little left over. We will go with 2 cups for the recipe.

Place 2 cups chicken broth/ or water with a bullion cube on the stove and bring to a boil.

Once water is boiling add in your 2 cups of couscous, stir, cover, turn off heat, and let it sit for 5 minutes.

Once the 5 minutes is over get a fork and fluff up your couscous. It looks very dense but once you start fluffing you will be amazed how light and how much it bulk up. I also always add a little butter when fluffing up the couscous to keep it from getting too dry.


Cut up and add: 12 grape tomatoes, 2 green onion sliced, 1/2 cup feta cheese, 1/4 cup red onion minced, and 1/3 cup shredded parmesan cheese. Toss with a fork and Enjoy--see super easy

Now the fun comes in when you start adding and taking away ingredients to make it  the perfect meal for you. I like to add shrimp in my salad for a little protein. I have done many different varieties and loved most of them. There were a few that were placed on the do not repeat list!

Let me know if you try this and what your perfect recipe combo has in it.

--R

Friday, June 15, 2012

L and his feeding tube

L has a Mic-key GJ Tube (a tube that bypasses his stomach) that provides all his nutrition because he will not/cannot eat enough to keep himself alive. L didn't get his tube until he was 16 months old and we had tried everything we could and followed every advice we could to try to get him to eat and gain weight. Getting his feeding tube was something we knew had to be done but we waited until we had exhausted every other idea before we consented. He started with a Gastric Tube (GT) that put formula into his stomach. He couldn't keep the formula down and was tiny because he couldn't gain weight so we switched to the tube that bypassed his stomach. He started gaining weight and became a happier healthier boy! This is the short side of the story.

We struggled with his eating, weight gain, reflux, vomiting, and many other things until he was almost 2 years old. He will have had his GJ Tube a year in August and even though life is easier, we still have our struggles. L still won't eat and only drinks about 1-2 ounces of fluid (usually water) on a good day. He is in therapy at his daycare and S L O W L Y takes little steps toward our goal of getting rid of his feeding tube. We are about to do one of the last tests to check him for something that may be causing his swallowing problems. After that we are going to really push eating and drinking and maybe do an intensive feeding program. I will say that one thing hubby and I both agree on is that if L has to be tube fed his whole life, we are okay with that. He is a miracle little boy who has an amazing story of God's healing in his life. With all that "could have been" we are so thankful that this is his only major lingering issue. There is so much more that I could write about but it would take months to get it all down!

There are many things that hubby and I want to use this blog for: sharing our thoughts, saving you money, sharing yummy recipes, and technical stuff I have no clue about! I also want to talk about what we go through with a son with a feeding tube. There are very few resources/information for children with feeding tubes and we want to share what we find. The more people that talk about it, the more attention it will receive, and more resources will become available! Even if you don't have a child with a feeding tube, chances are you will run into someone who does or a friend of a friend will surface that could use information. I hope that we can become a place where people can turn to for information!

I LOVE MY TUBIE AND HIS TWIN!


-R

Wednesday, June 13, 2012

Vinegar Rinse


Back to the fresh strawberries! I heard from friends about rinsing them in vinegar to make them last a little longer. I decided to try it and see if it worked. I got a half flat of strawberries from the farmers market and they were beautiful. I was working and couldn't get to them for several days and by the second day they were starting to get soft. I decided to freeze most of them but wanted some to take to work the last day.

I got a big bowl and put the strawberries that I wanted to keep fresh in it. I got a measuring cup and did 1/4 cup vinegar and 3/4 cup water. I dumped that in the bowls with the strawberries and gently hand tossed the berries in the water. I let them sit while I cleaned and cut up the berries I wanted to freeze. After I finished with those berries I returned to the berries sitting in the vinegar water. I drained the water and rinsed them with running water. I ate the few that were already getting mushy with no bitter vinegar taste and placed them into the fridge.

I was very surprised that 3 and 4 days later I still had beautiful strawberries that hadn't molded or turned to mush! I will be doing this every time I get some fresh fruit. I am pretty sure this will work on most berries but don't know about other fruits like peaches or plums. I can't wait until peaches are in season and I can find out!

-R

Monday, June 11, 2012

NFL - Please Take My Money!

I had the privilege of writing a guest column for one of my favorite blogs, Fangs Bites, which does a great job covering sports media and broadcasting.  Follow the link below to see why I want to give the NFL my money:

Guest Column: NFL — Please Take My Money | Fang's Bites

Friday, June 8, 2012

Swimming Holes

It is HOT! We do not have a pool (except a small plastic one in the back yard) and we do not have access to a pool that doesn't cost an arm and leg to join. I stumbled on this website when looking for cheap/ free alternatives to a community pool since my boys LOVE the water. It is http://swimmingholes.org and you can search for parks and off beat swimming holes in your area. Some of them are close to home and others you can take a day trip to go swim and enjoy the summer.

The website tells you many things like what town it is close, a link to Google maps, what type of water it is (hot spring, swimming hole, wading area, park), descriptions, and directions. Some have pictures attached and if there are facilities on site or near the area.

Here are a couple examples for states across the country:


Georgia:
Hike through the Cochran Mill Park along a medium-sized creek (Bear Creek) with several beautiful waterfalls and rock slides. Not really a swimming place, more a wading, water-play and sliding place. There is also a nature center here


Florida:
Rainbow Springs is a large spring and is the headwater for the Rainbow River. Can swim and snorkel (tube also but only at the campground) in the river. A beautiful park (used to be a private tourist attraction) and well worth a trip to visit this first magnitude spring and the Rainbow River, which is crystal clear over it's entire length. Great hike through the park also.


Utah:
Beautiful falls which drop 126 feet into a cool desert swimming pool. Three mile hike each way. Not much elevation change but it can be hot and much of it is on a sandy trail which is tiring. Popular hike, lots of people on weekends. Park at campground (may be crowded parking on weekends)and pay day use fee. Follow the well-marked trail north about 3 miles (each way) to the waterfall. May be shallow late in season. 


New York:
There is a very beautifully developed official swimming beach (with lifeguard) here in a glacier-scoured, spring-fed "kettle" lake. 


Arizona:
There is a very beautifully developed official swimming beach (with lifeguard) here in a glacier-scoured, spring-fed "kettle" lake. 


Hope you find some place nearby that you can enjoy! If you go, take some pictures and send them to us!